Quick Reference
Setup Overview:
- Process video with AV-Sync Tool (assign Video Code starting with "A1")
- Upload audio file to Guide-ID platform in an AV-Sync stop
- Connect Brainbox to media player with 3.5mm jack and power via USB-C
- Adjust media player volume (30-40% recommended)
- Press switch button on Brainbox for Auto Gain setup
- Test synchronization with Podcatcher Pro
Prerequisites
Before beginning setup, ensure you have:
- Original video file(s) for processing
- Guide-ID AV-Sync Tool installed (AV-Sync-Video-Tool-0.5.exe)
- Guide-ID Brainbox hardware
- 3.5mm audio jack cable
- USB-C cable for power
- Access to Guide-ID platform
- Beacon Lite for visitors to scan
- Podcatcher Pro devices for testing
Step 1: Preparing the Movie File
- Download the Guide-ID AV-Sync Tool AV-Sync-Video-Tool-0.5.exe
- Drag & drop (or open) your original video file in the AV-Sync Tool
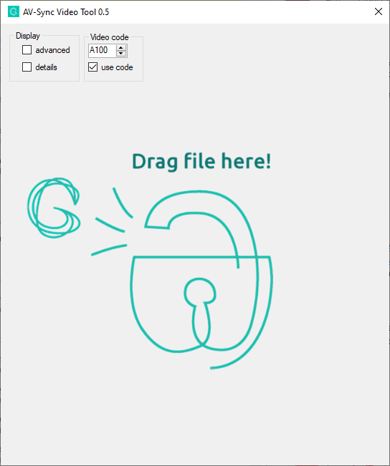
- Assign a unique Video Code to each movie file
- Note: Start your codes with "A1" (e.g., A101, A102, A1FA, A19F)
- Process your video through the tool
Note: The tool generates two files in the same folder as your original:
- A video file with timecode (ends with "_video")
- An audio file for the Platform (ends with "_audio")
Step 2: Adding the Audio File to the Platform
- Log into the Guide-ID platform
- Create a new AV-Sync stop, add a stop select the AV-sync stop type

- Upload the generated audio file
- Enter the exact same Video Code you assigned in the tool

- Add the Beacon Lite or Beacon Pro code (found on back of beacon)
Tip for Multilingual Museums: For additional languages, upload separate audio files for each language. Ensure all audio files have the same length as the original.
Step 3: Test the Video Playback
- Transfer the processed video file to your media player
- Play the video to ensure it displays correctly on screen
- Adjust the media player volume:
- Ensure audio is not muted
- Set volume to 30-40% (in most cases optimal)
Caution: You will hear beeping sounds during playback. This is normal - these beeps are the timecode that synchronizes with the Brainbox when you plugin the audio cable.
Step 4: Brainbox Setup
- Connect cables to the Brainbox:
- 3.5mm jack cable from media player audio output to Brainbox
- USB-C cable to power adapter or USB-A port on media player
- Observe LEDs:
- Both LEDs (WiFi and AV-Sync) should blink orange once
- Press the small switch button on the Brainbox
- Wait for Auto Gain completion:
- AV-Sync LED turns orange during setup
- LED will flash green within about 15 seconds when complete
Warning: If Auto Gain takes longer than 15 seconds, check the media player volume. It may need adjustment.
Step 5: Test the Complete Setup
- Ensure your tour is published and synced on the Guide-ID platform
- Test with a Podcatcher Pro:
- Play the AV-Sync stop
- Trigger the Beacon linked to the AV-sync stop
- For testing you can also scan the Brainbox directly
- Verify the audio plays in sync with the video
- Test in all available languages
Understanding Brainbox LED Indicators
| AV-Sync LED Color | Meaning | Action Required |
|---|---|---|
| Green blinking | AV-Sync signal functioning correctly | None - system working properly |
| Orange (1 short blink) | Brainbox is powered on | None - normal startup indicator |
| Solid orange | Auto Gain in progress | Wait for completion (should turn green) |
| Red blinking | Receiving audio but not correct AV-Sync track | Check media player volume, verify correct video file is playing |
| LED off | No audio signal processing | Check volume, audio connections, power |
Troubleshooting Tip: If the LED blinks red, use headphones to test if you can hear the timecode beeps. If not, the AV-Sync track may not be added to the video correctly.
Success Indicators
You'll know your AV-Sync setup is successful when:
- Brainbox AV-Sync LED blinks green during video playback
- Audio plays on Podcatcher Pro when pointed at AV-Sync Beacon
- Audio stays perfectly synchronized with video content
- Visitors can select different languages without affecting synchronization
Next Steps
After successful setup, consider these optimization opportunities:
- Position Beacon Lites at optimal scanning locations near video displays
Note: the Brainbox doesn't need a Wi-Fi connection to work; it just needs power (through a USB-C 5V adapter) and the correct audio signal from a media player.