Adding Beacons
Beacons activate content on Podcatcher Pro devices by allowing visitors to hold the device close to access associated content.
1. Adding beacons for tour languages
Section titled “1. Adding beacons for tour languages”To add a beacon for tour language selection:
- Access the first stop and open Stop Settings
- Enter the physical device’s beacon code
- Ensure the label flag matches the language
- Add beacons for each language by clicking the language codes and entering their codes
- Click Save
2. Adding beacons for other stops
Section titled “2. Adding beacons for other stops”- Click the stop and open Stop Settings.
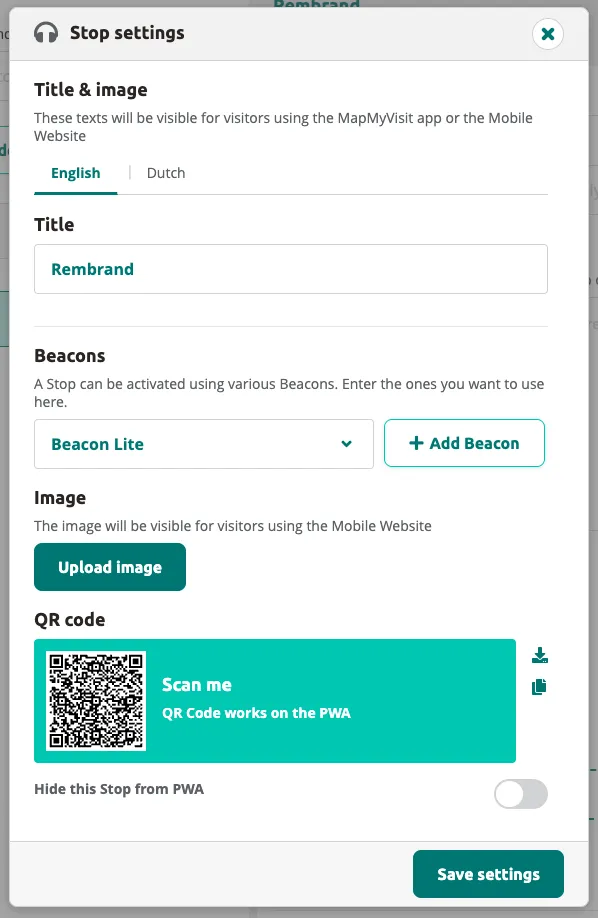
- Select the beacon type from the dropdown and click Add Beacon.
![]()
- Enter the beacon code printed on the physical device.
![]()
- To add more beacons, click Add another Beacon. You can mix different beacon types on a single stop. Beacon Pro allows you to set a trigger distance.
![]()
3. Adding beacons with special functions
Section titled “3. Adding beacons with special functions”Special-function beacons are managed from the Beacons page (accessible via the sidebar). Unlike stop beacons, these are not tied to a single tour stop — they serve dedicated purposes such as security alarms, headphone pairing, group tours, and shared listening.
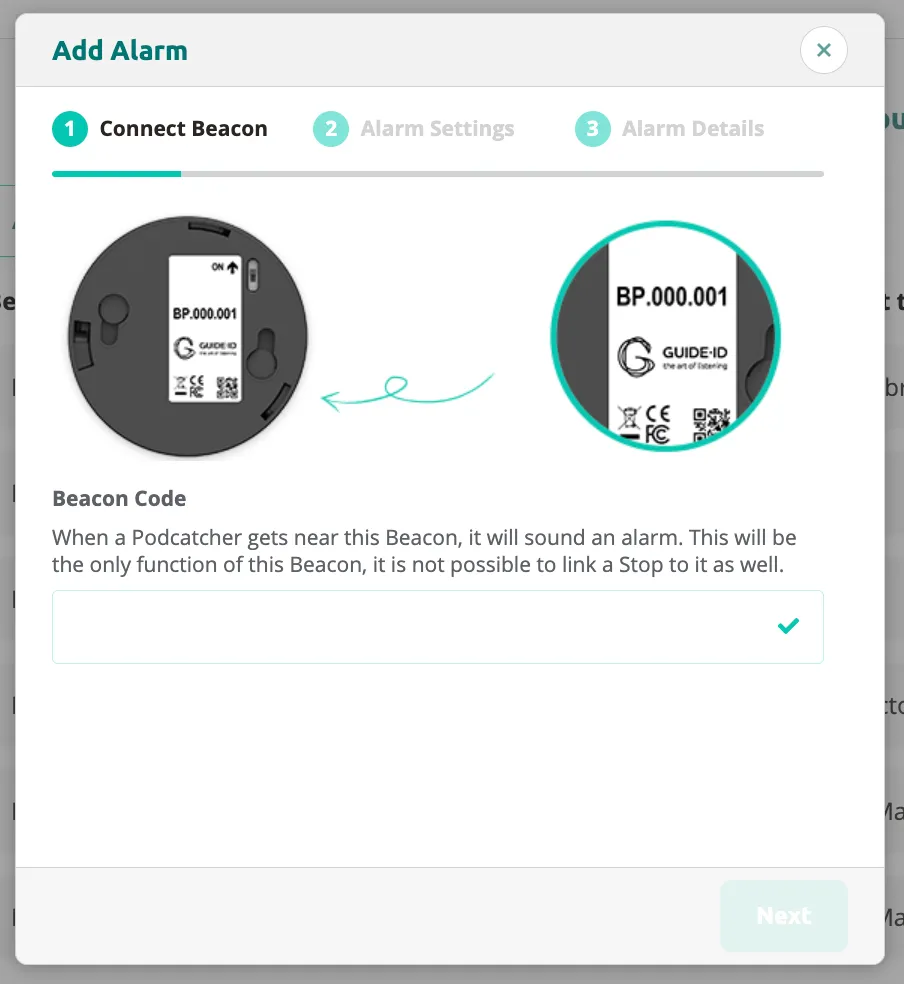
Alarms
Section titled “Alarms”Alarm beacons trigger an audible alert on Podcatcher Pro devices when a visitor moves within range. Use them at exits, restricted areas, or anywhere you need to deter unauthorized removal of devices. Once triggered, the visitor cannot silence the alarm — it stops only when the Podcatcher Pro is docked in a Basecamp or the visitor scans a Beacon Lite (e.g. at the welcome desk).
-
On the Beacons page, switch to the Alarms tab. You will see an overview of any existing alarm beacons.

-
Click Add new Alarm +. The wizard opens at Step 1 — Connect Beacon. You will see photos of the physical Beacon Pro and Beacon Lite devices for reference.
-
Enter the beacon code printed on your physical device (e.g.
BP.000.001for Beacon Pro) and click Next. -
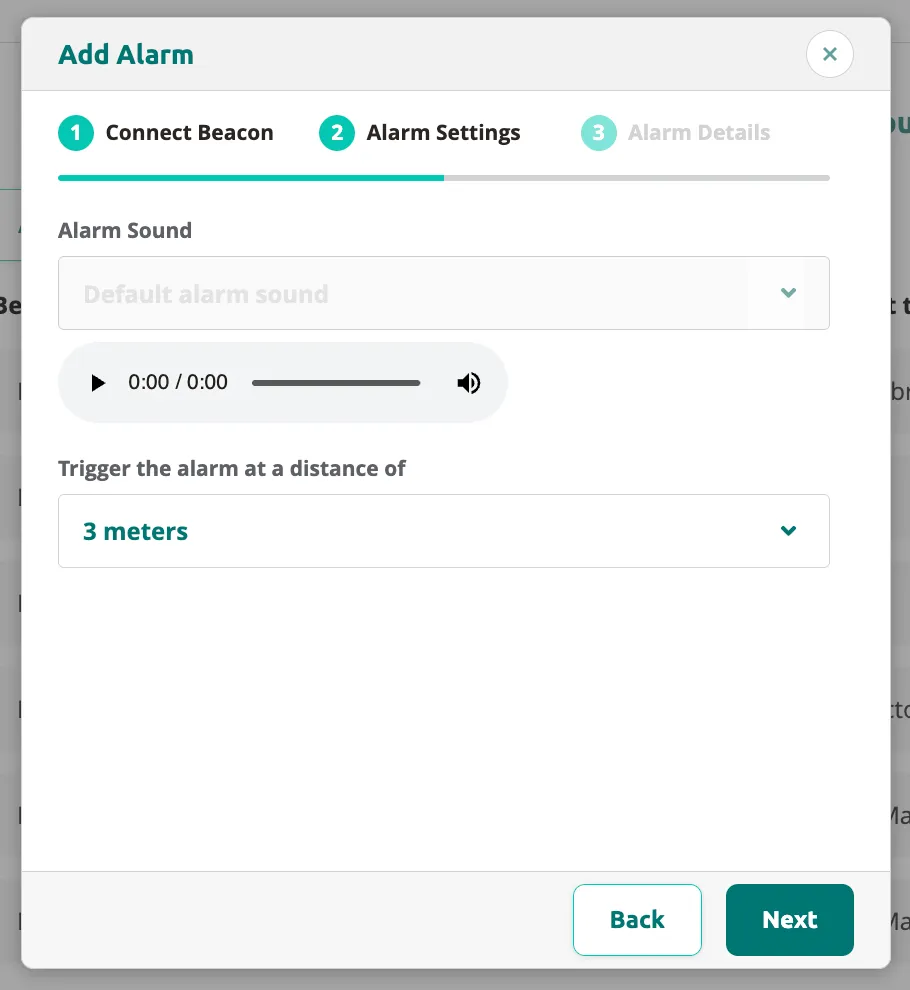
In Step 2 — Alarm Settings, configure the alarm behavior:
- Select an alarm sound from the dropdown (or keep the Default).
- Use the play button to preview the sound.
- Set the trigger distance in meters — this determines how close a Podcatcher Pro must be before the alarm activates.
-
Click Next to proceed to Step 3 — Alarm Details. Enter a descriptive name for the alarm (e.g. “main exit”) so you can easily identify it in the overview.
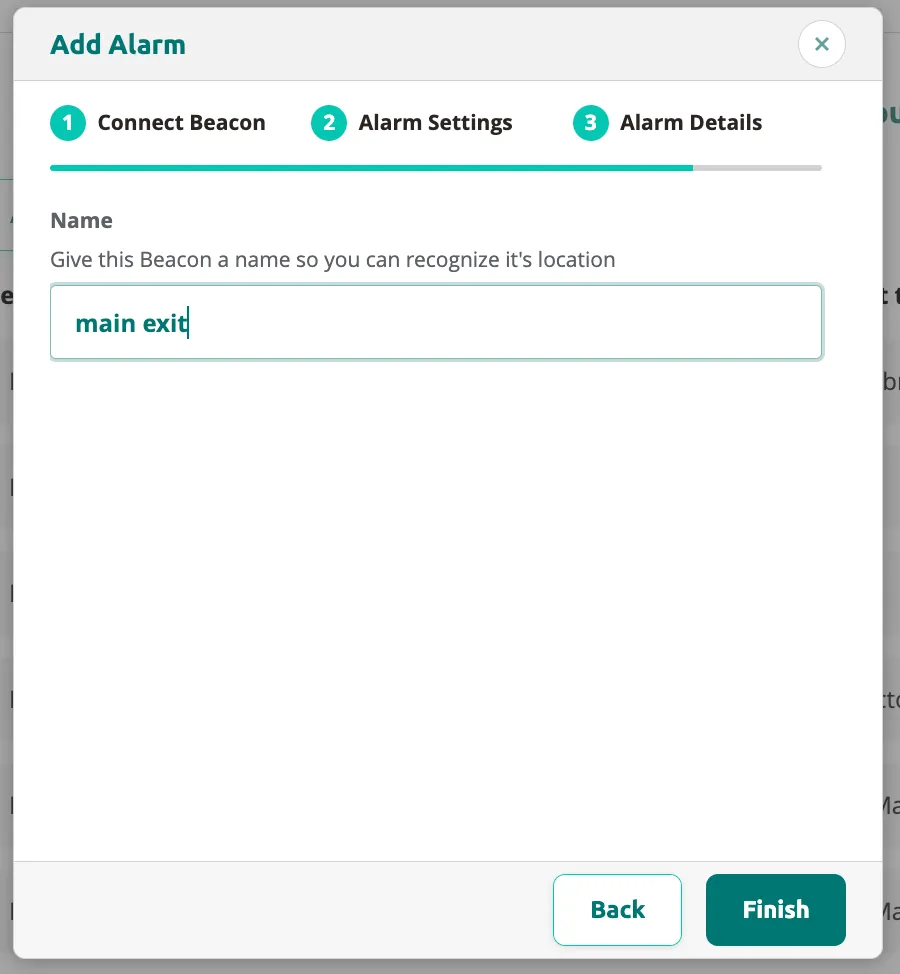
-
Click Finish to create the alarm beacon. It now appears in the Alarms tab overview.
Headphone connectors
Section titled “Headphone connectors”Headphone connector beacons allow visitors to pair their Podcatcher Pro with a headphone set at a specific location (e.g. a desk or distribution point).
-
On the Beacons page, click Add new Headphone connector +. The wizard opens at Step 1 — Connect Beacon. You will see photos of the physical beacon devices.
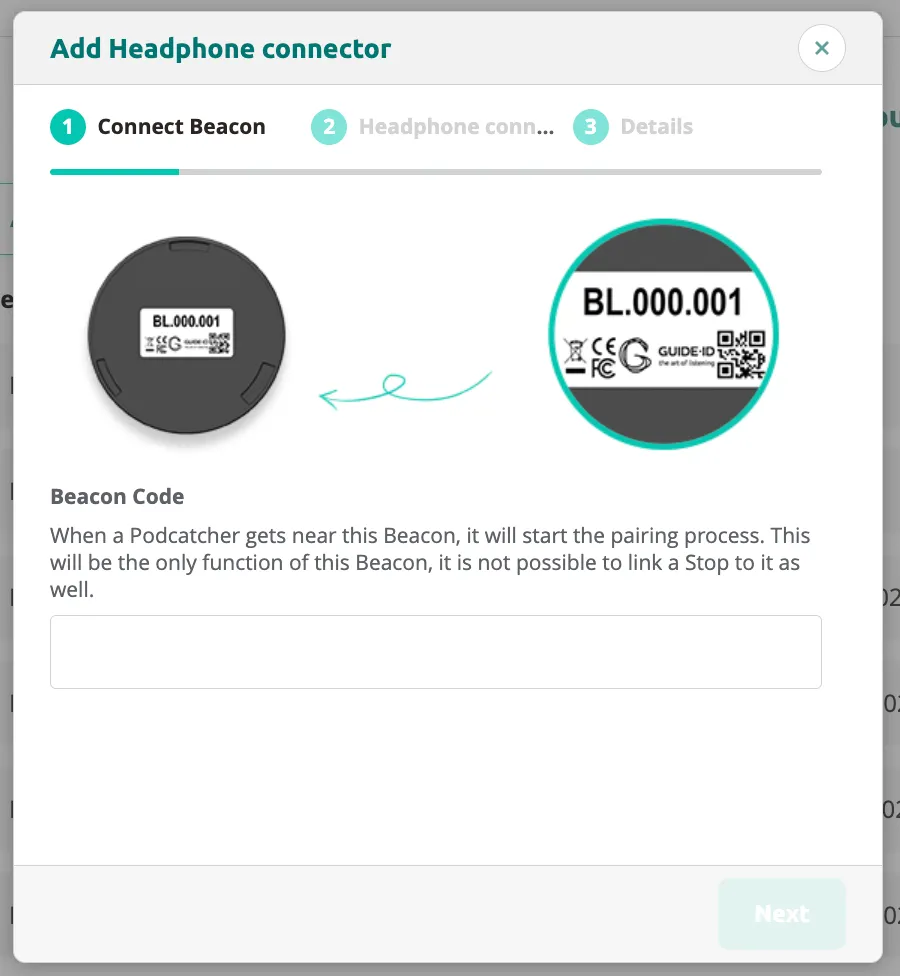
-
Enter the beacon code printed on the physical device and click Next.
-
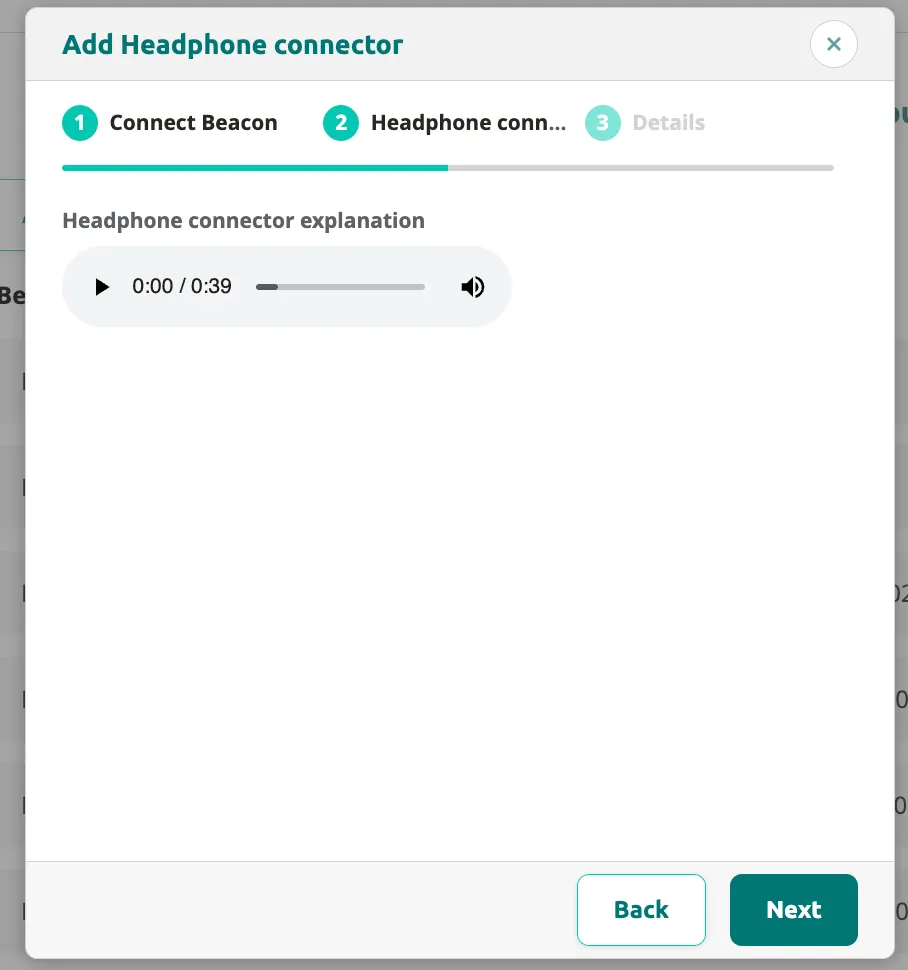
In Step 2, you can configure an audio explanation that plays on the Podcatcher when a visitor scans the headphone connector beacon. Use the playback controls to preview the audio clip.
-
Click Next to proceed to Step 3 — Details. Enter a descriptive name for the headphone connector (e.g. “Pairing Beacon”).
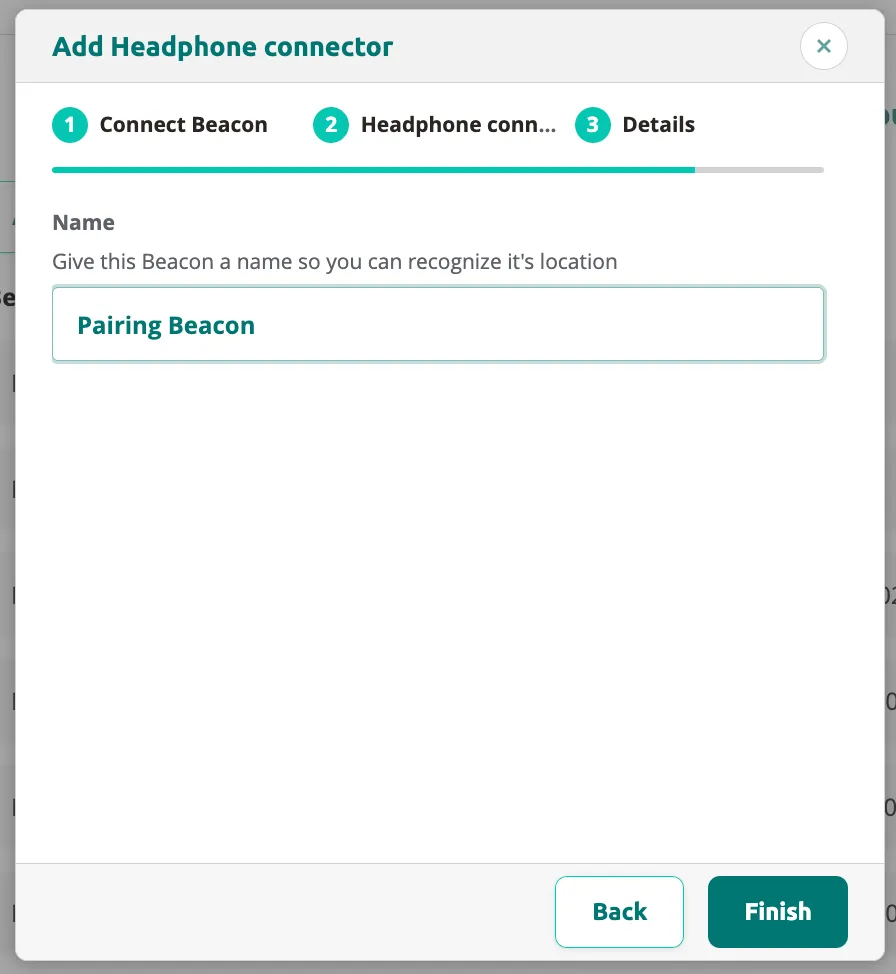
-
Click Finish to complete. The headphone connector beacon is now active.
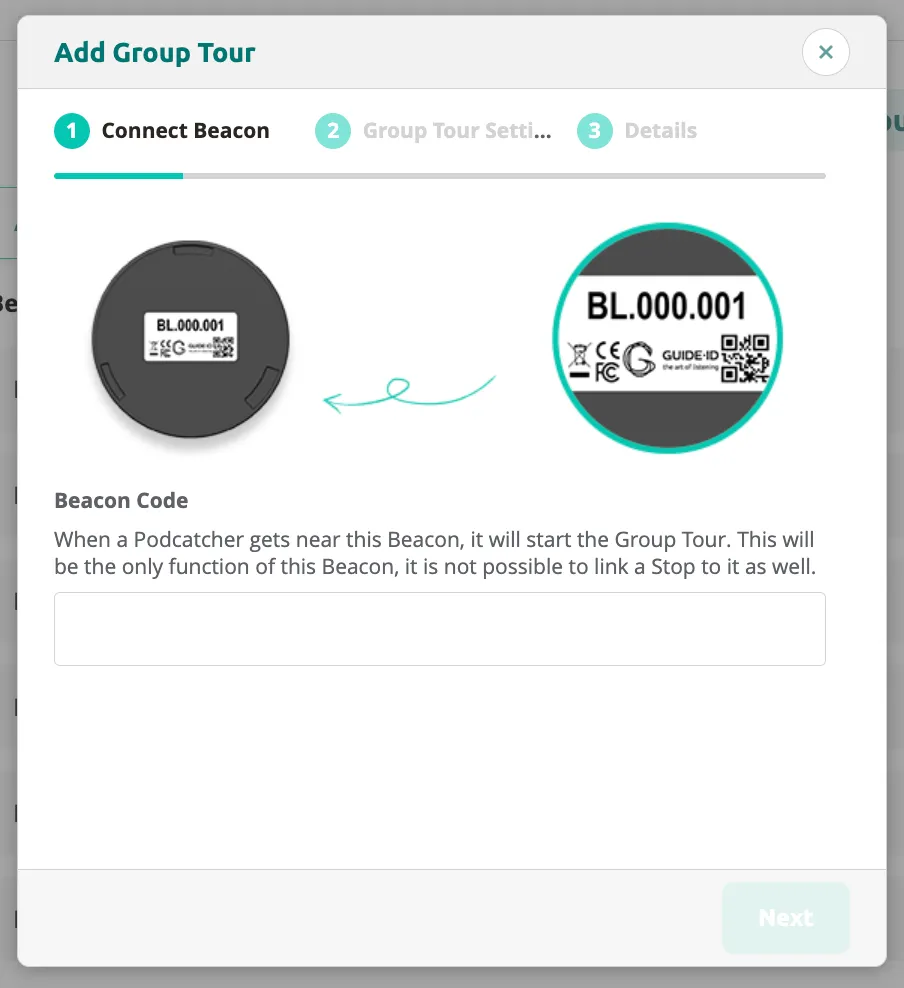
Group Tours
Section titled “Group Tours”Group Tour beacons synchronize multiple Podcatcher Pro devices so a guide can control playback for an entire group simultaneously.
-
On the Beacons page, click Add new Group Tour +. The wizard opens at Step 1 — Connect Beacon with photos of the physical devices for reference.
-
Enter the beacon code from the physical device and click Next.
-
Follow the remaining on-screen steps to complete the Group Tour beacon setup and click Finish.
Shared Listening
Section titled “Shared Listening”Shared Listening beacons allow multiple Podcatcher Pro devices to play the same audio content simultaneously when visitors are near the beacon — ideal for exhibit stations where several people listen together.
-
On the Beacons page, click Add new Shared Listening +. In Step 1 — Connect Beacon, enter the beacon code (e.g.
BL.121.222).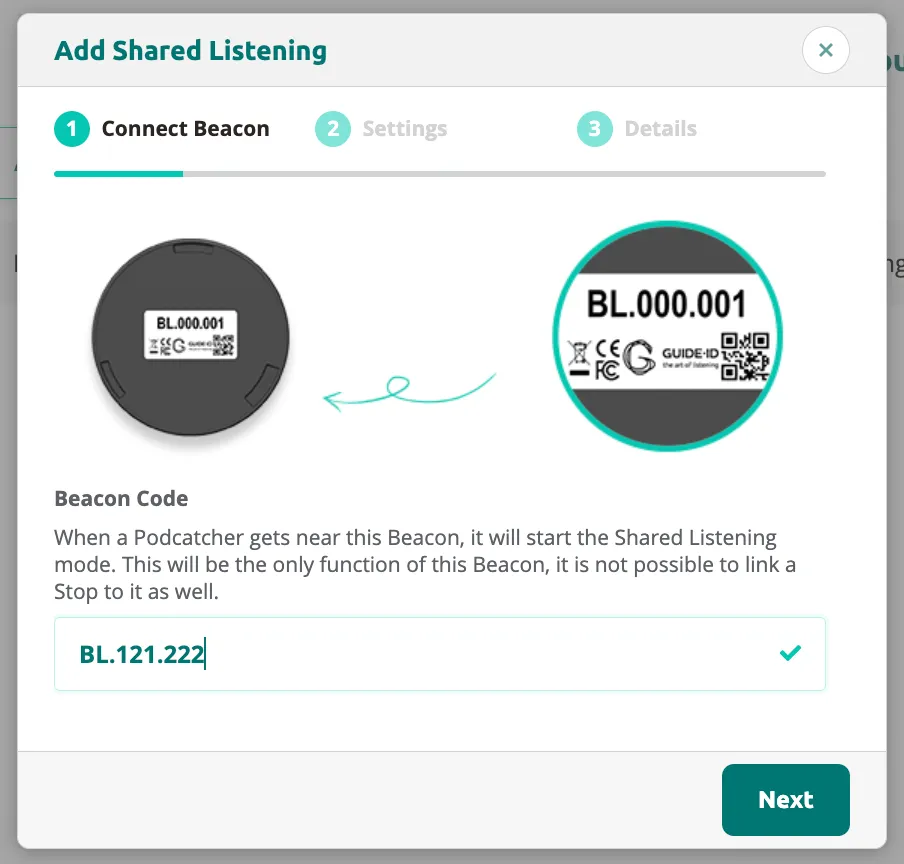
-
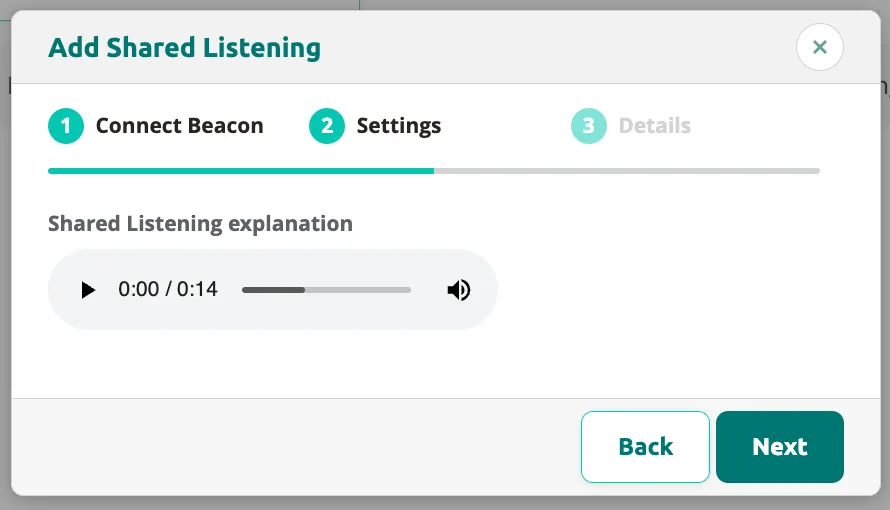
Click Next to proceed to Step 2 — Settings. Here you can configure a Shared Listening explanation audio that plays when a visitor’s Podcatcher connects. Use the playback controls to preview the clip.
-
Click Next to proceed to Step 3 — Details. Enter a descriptive name for the Shared Listening beacon so you can identify it in the overview.
-
Click Finish to complete. The Shared Listening beacon is now active.
4. Hardware overview
Section titled “4. Hardware overview”The Beacons page provides a centralized overview of all beacons across your site.
Stop Beacons tab
Section titled “Stop Beacons tab”The Stop Beacons tab lists every beacon linked to a tour stop. Each row shows the beacon code, Links to Stop(s), language, last triggered timestamp, battery level, and available actions.
![]()
Adding beacons in bulk
Section titled “Adding beacons in bulk”To register new physical beacons before linking them to stops, click Add new Beacon +. A dialog appears showing photos of Beacon Pro and Beacon Lite devices. Enter the beacon code from each device to add it to your inventory.
![]()
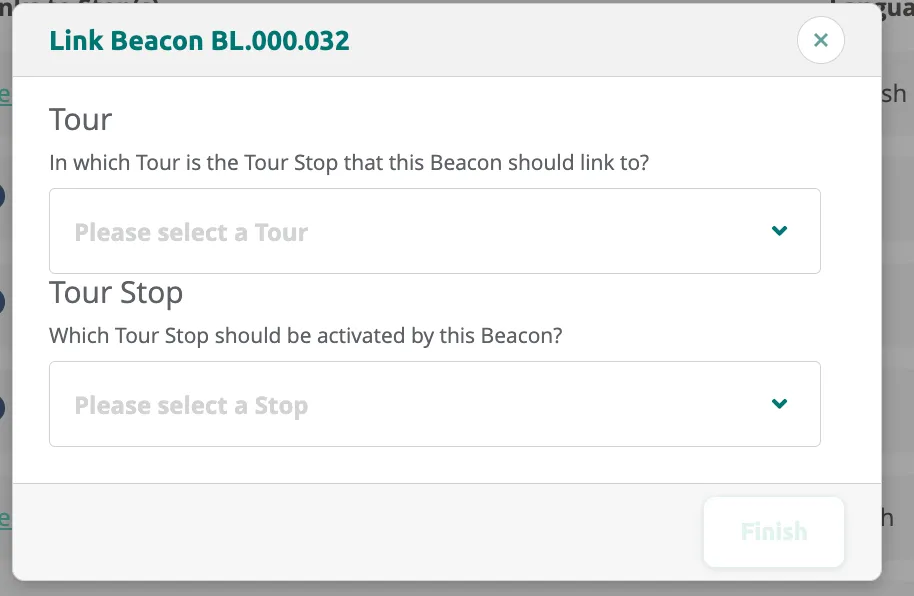
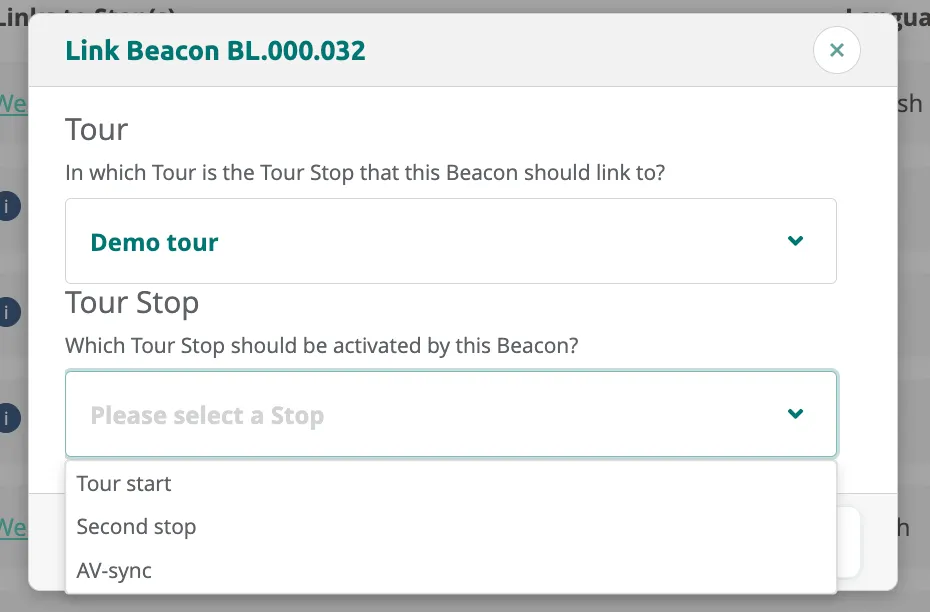
Linking a beacon to a stop
Section titled “Linking a beacon to a stop”To link a beacon to a specific stop after adding it:
-
Click the Link action on the beacon row. The Link Beacon dialog opens with empty dropdowns for tour and stop.
-
Select the tour from the first dropdown, then choose the stop from the second dropdown. The stop list updates to show all stops in the selected tour (e.g. Tour start, Second stop, AV-sync).
-
Click Finish to confirm the link.
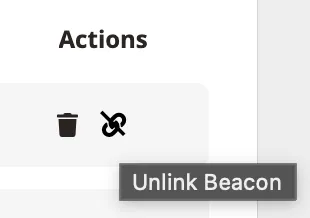
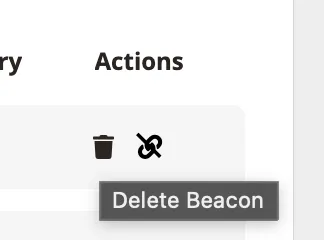
Unlinking and deleting beacons
Section titled “Unlinking and deleting beacons”-
To unlink a beacon from its stop (without removing it from the system), hover over the unlink icon in the Actions column and click it.
-
To delete a beacon entirely, hover over the delete icon in the Actions column and click it.
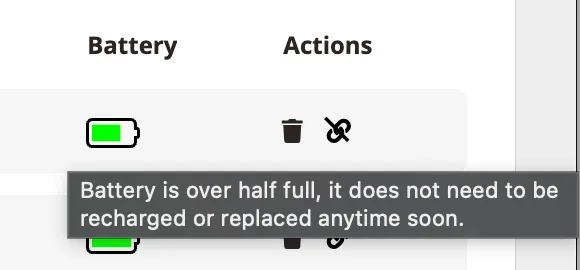
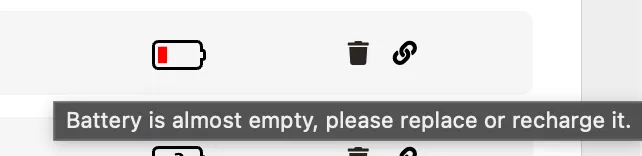
Battery status
Section titled “Battery status”Each beacon row displays a battery indicator. Hover over the battery icon to see a detailed tooltip:
-
Battery over half full: “Battery is over half full, it does not need to be recharged or replaced anytime soon.”
-
Low battery: “Battery is almost empty, please replace or recharge it.”
Related articles
Section titled “Related articles”- Beacon Overview — understand beacon types and use cases
- Set Up Automatic Triggering — configure beacon-based content activation
- Adding Content to a Tour — add audio to your stops
- Hardware Management — monitor beacon and device status