Editing Clips and Clip Settings
Configure individual clips with audio, text, media, and playback settings to create a polished visitor experience.
Open clip settings
Section titled “Open clip settings”- Click on a clip in the Clipflow to open its settings panel.
The settings panel appears on the right side of the Tour Editor and contains tabs for content, media, and configuration.
Add clip content
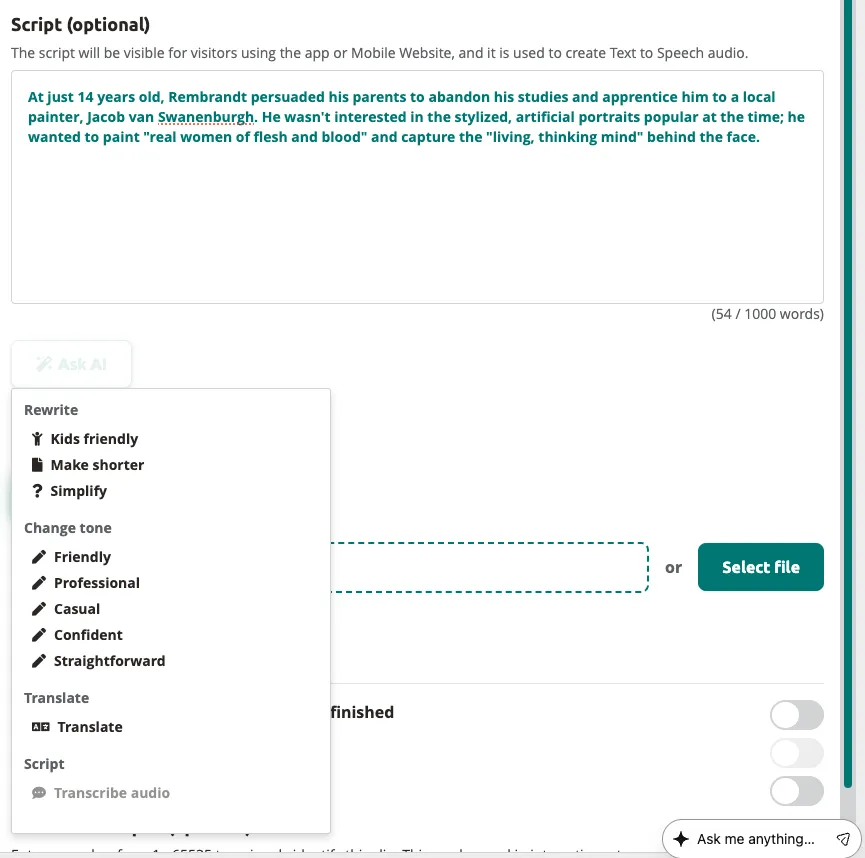
Section titled “Add clip content”- Enter your script text in the Script field.
This text serves as the narration script for the clip. You can use it as a reference for voice-over recording or as input for Text-to-Speech.
Generate audio with Text-to-Speech
Section titled “Generate audio with Text-to-Speech”-
Click
Text to Speechbelow the content field. -
Review the script in the Script field. Edit it if needed — the Text-to-Speech engine reads exactly what is written here.
-
Select a voice from the voice dropdown.
-
Click
Generateto create the audio file. -
Preview the generated audio by clicking the play button. If the result is not satisfactory, adjust the script and click
Generateagain.
Add media
Section titled “Add media”-
Scroll to the Media section in the clip settings panel.
-
Upload an image by dragging it into the drop zone or clicking
Select file. -
Upload a video file if your tour supports video content on the target device.
Configure clip settings
Section titled “Configure clip settings”- Scroll to the Settings section of the clip panel.

- Toggle Automatically replay this clip when it is finished on or off. When enabled, the clip loops back to the beginning after playback completes.
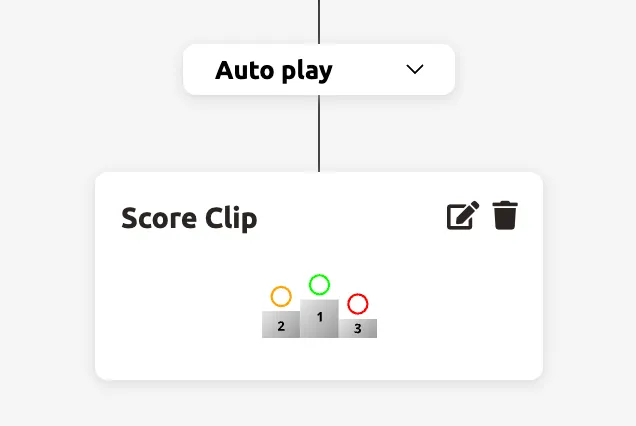
Set up scoring
Section titled “Set up scoring”- Toggle Enable scores to assign point values to clips. Select a score value (5, 10, or 25) from the dropdown.


Clips with scores show a trophy badge in the Clipflow, making it easy to see point values at a glance.
- Toggle Display Score on LED Ring to show visual feedback on the Podcatcher. The LED ring turns green, orange, or red based on the score ranges configured in Tour Settings.

- A Score Clip is automatically added at the end of a scored branch, showing the final podium result to the visitor.
Configure connections
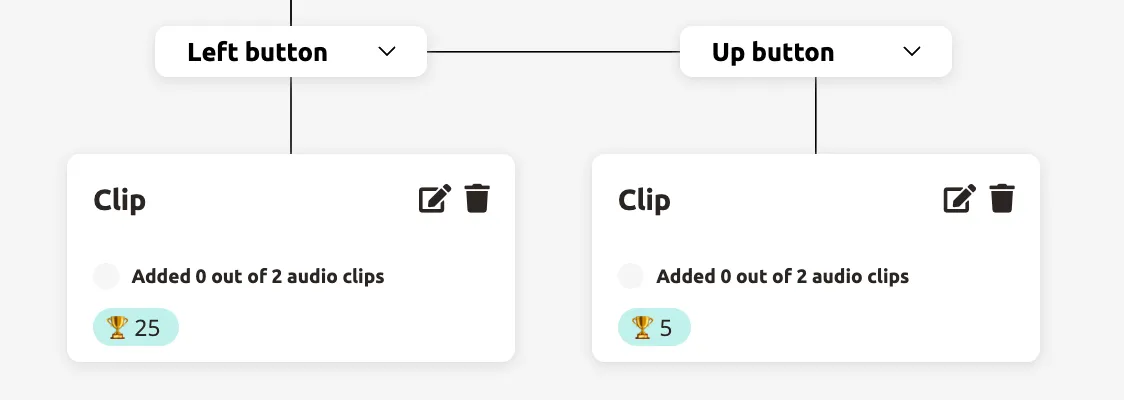
Section titled “Configure connections”-
Click the Connection tab in the clip settings to view and adjust outgoing connections.
-
Set the connection type for each outgoing branch (Auto play, button, or Randomize). See Using the Tour Editor for details on connection types.
Your clip is now configured with content, audio, media, and the right playback settings. Repeat these steps for each clip in your Clipflow to complete your tour stop.
Next: Adjusting Tour Settings
Related articles
Section titled “Related articles”- Using the Tour Editor — build branching Clipflows
- Text-to-Speech — generate audio from scripts
- Adjusting Tour Settings — configure scoring ranges and devices
- Adding Content to a Tour — manage stops and translations