Using the Tour Editor
Build interactive, branching audio experiences for your visitors by arranging clips and connections in the Tour Editor.
Access the Tour Editor
Section titled “Access the Tour Editor”-
Go to Tours → My Tours in the Platform.
-
Click on the tour you want to edit.
-
Click on a stop in the stop list to open it in the Tour Editor.
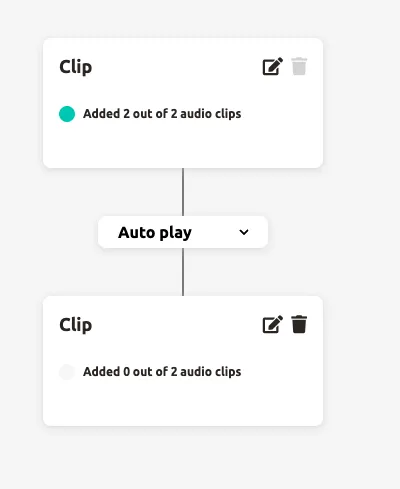
The Tour Editor displays your stop’s Clipflow — a tree structure where clips (nodes) are connected by branches. Each stop has exactly one Start Clip at the top of the tree, which cannot be deleted.
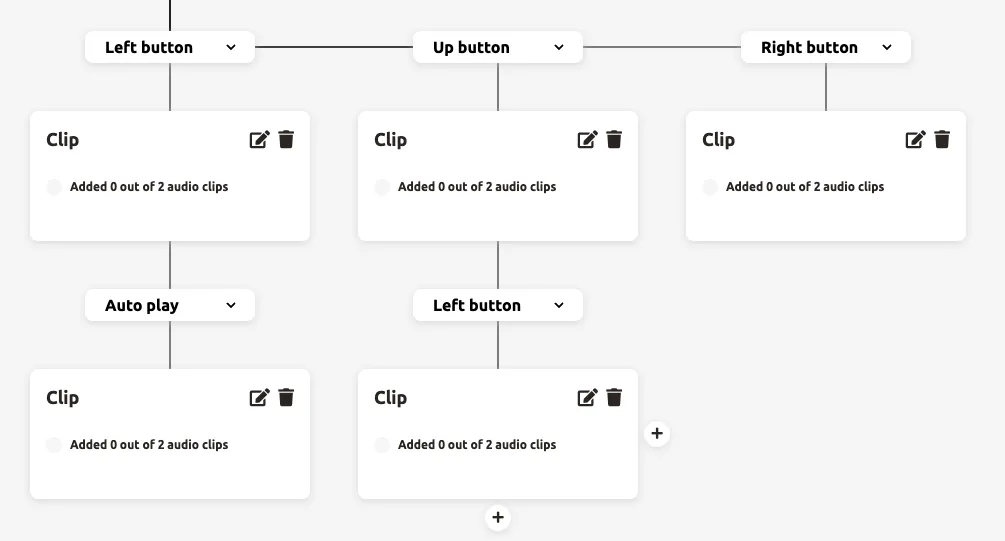
Understand the Clipflow structure
Section titled “Understand the Clipflow structure”The Clipflow works like a decision tree. Audio clips are arranged in levels, and connections between them determine what happens when a clip finishes playing.
- Levels run from top to bottom — the Start Clip is at the top level.
- Branches run left to right on the same level.
- Connections can only go one level deeper or one level higher — you cannot skip levels.
Add clips
Section titled “Add clips”-
Click the + button below a clip to add a new clip one level deeper in the tree.
-
Click the + button to the right of a clip to add a new clip on the same level as a sibling branch.
Set connection types
Section titled “Set connection types”- Click the connection line between two clips to change the connection type.
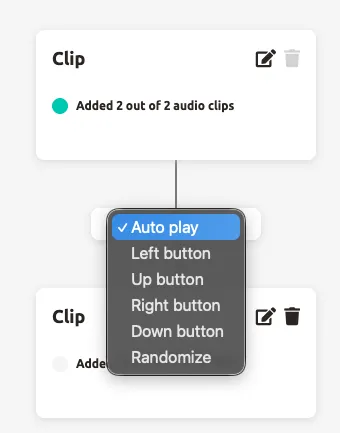
- Select one of the following connection types:
| Connection type | Behaviour | Use case |
|---|---|---|
| Auto play | The next clip plays automatically when the current clip finishes | Linear narratives, guided tours |
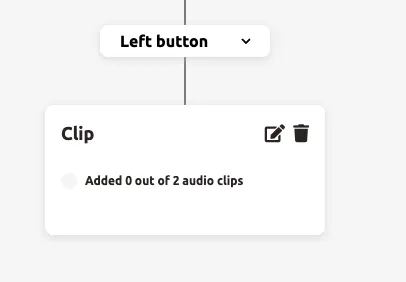
| Left / Up / Right / Down button | The next clip plays when the visitor presses the corresponding button on their Podcatcher Pro | Interactive quizzes, choose-your-own-path tours |
| Randomize | A random clip is chosen from up to 4 child clips when the current clip finishes | Varied experiences, fun facts rotation |
Randomize
Section titled “Randomize”Randomize lets you create varied visitor experiences. When a visitor triggers a stop, the Podcatcher Pro randomly selects and plays one of up to 4 connected clips. If the visitor scans the same beacon again, a new random selection is made — note that the same clip may be chosen again.

With an intro clip: Add audio to the parent clip. The visitor hears the intro first, then a random clip plays automatically. This works well for an introduction followed by a random story or fun fact.
Without an intro clip: Leave the parent clip empty (no audio). The visitor scans the beacon and immediately hears one of the random clips. This creates the experience of a different story at each visit.
Button mapping
Section titled “Button mapping”On Podcatcher Pro, the four directional buttons each trigger a different branch in the Clipflow. On the PWA, visitors see on-screen buttons labelled A, B, C, and D that map to Left, Up, Right, and Down respectively.
Group clips for convergence
Section titled “Group clips for convergence”Grouping lets multiple branches merge back into a single clip on the next level — useful when different choices should eventually lead to the same conclusion.
-
Select all clips on the same level that you want to group.
-
Click
Groupto link them together.
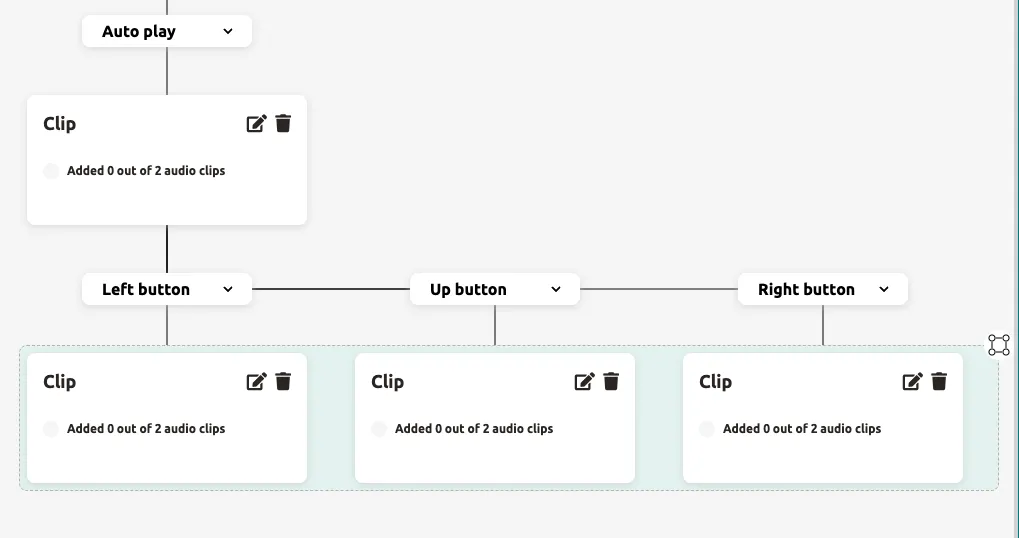
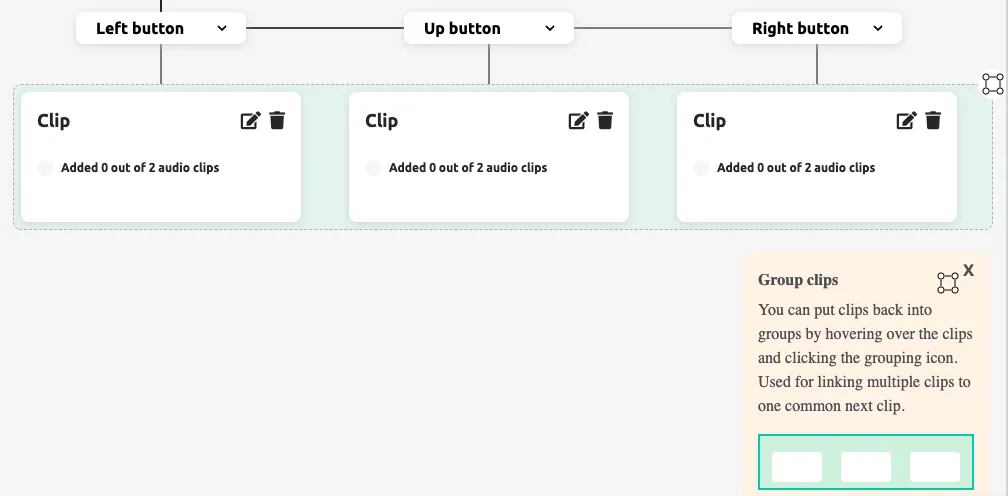
- Add a clip below the grouped set — this single clip becomes the shared continuation point for all grouped branches.
Remove clips
Section titled “Remove clips”To delete a clip from the Clipflow:
- Click the trash icon on the clip you want to remove.
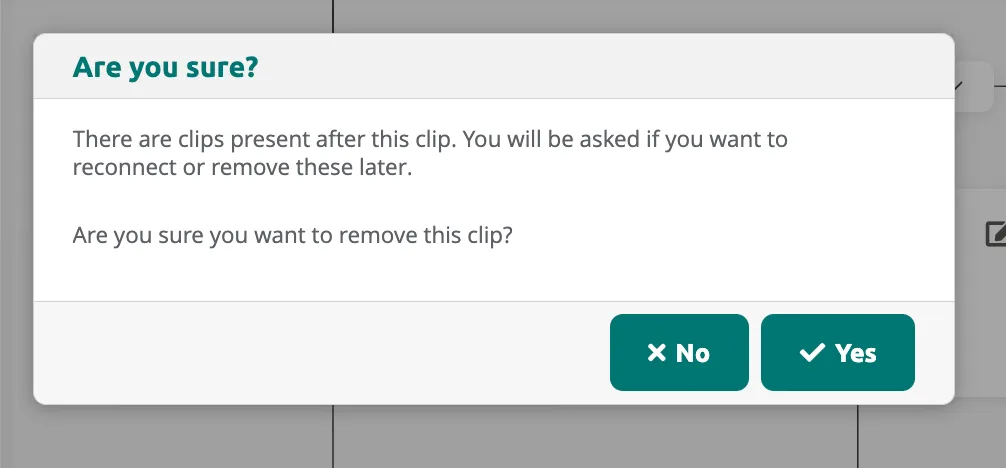
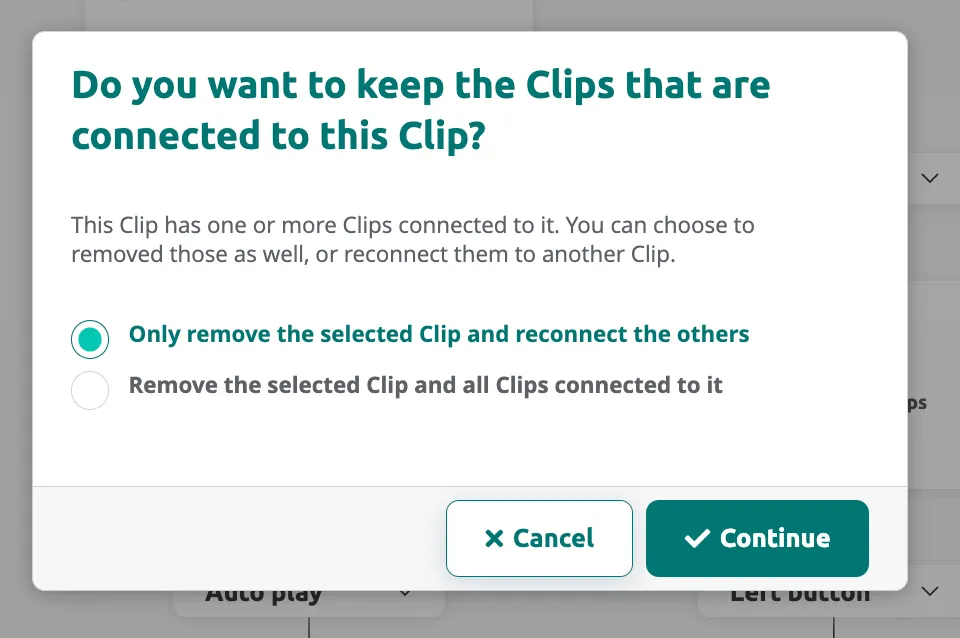
- If the clip has connected clips below it, you are asked whether to keep or remove them:
- Only remove the selected Clip and reconnect the others — child clips are reconnected to the parent
- Remove the selected Clip and all Clips connected to it — deletes the entire branch
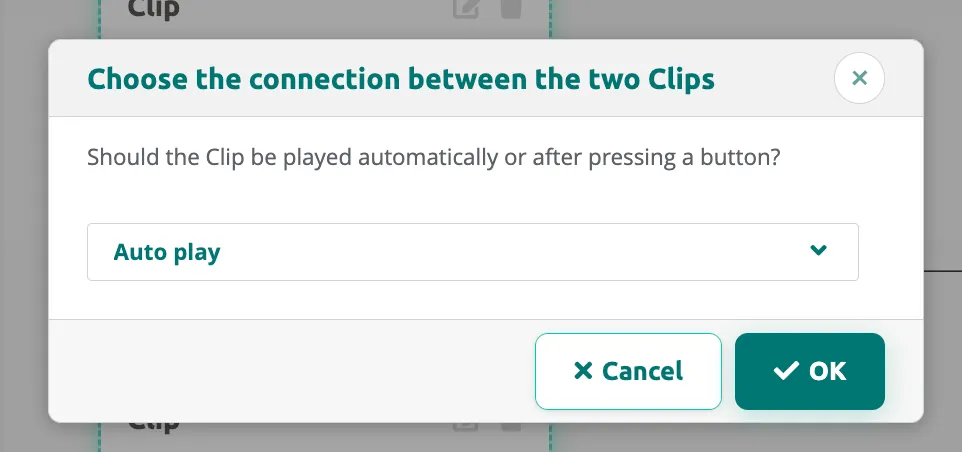
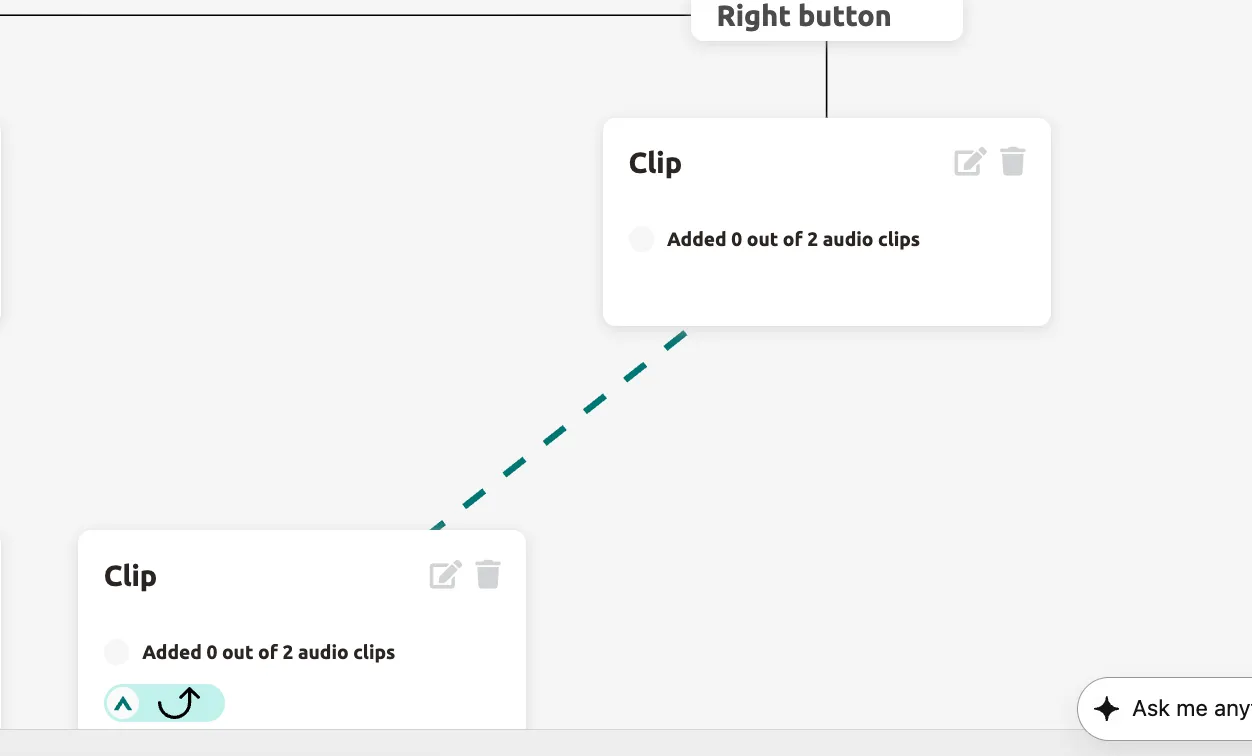
- After deletion, disconnected clips may appear. The editor highlights them with a warning banner. Click a disconnected clip, then click the clip you want to connect it to.
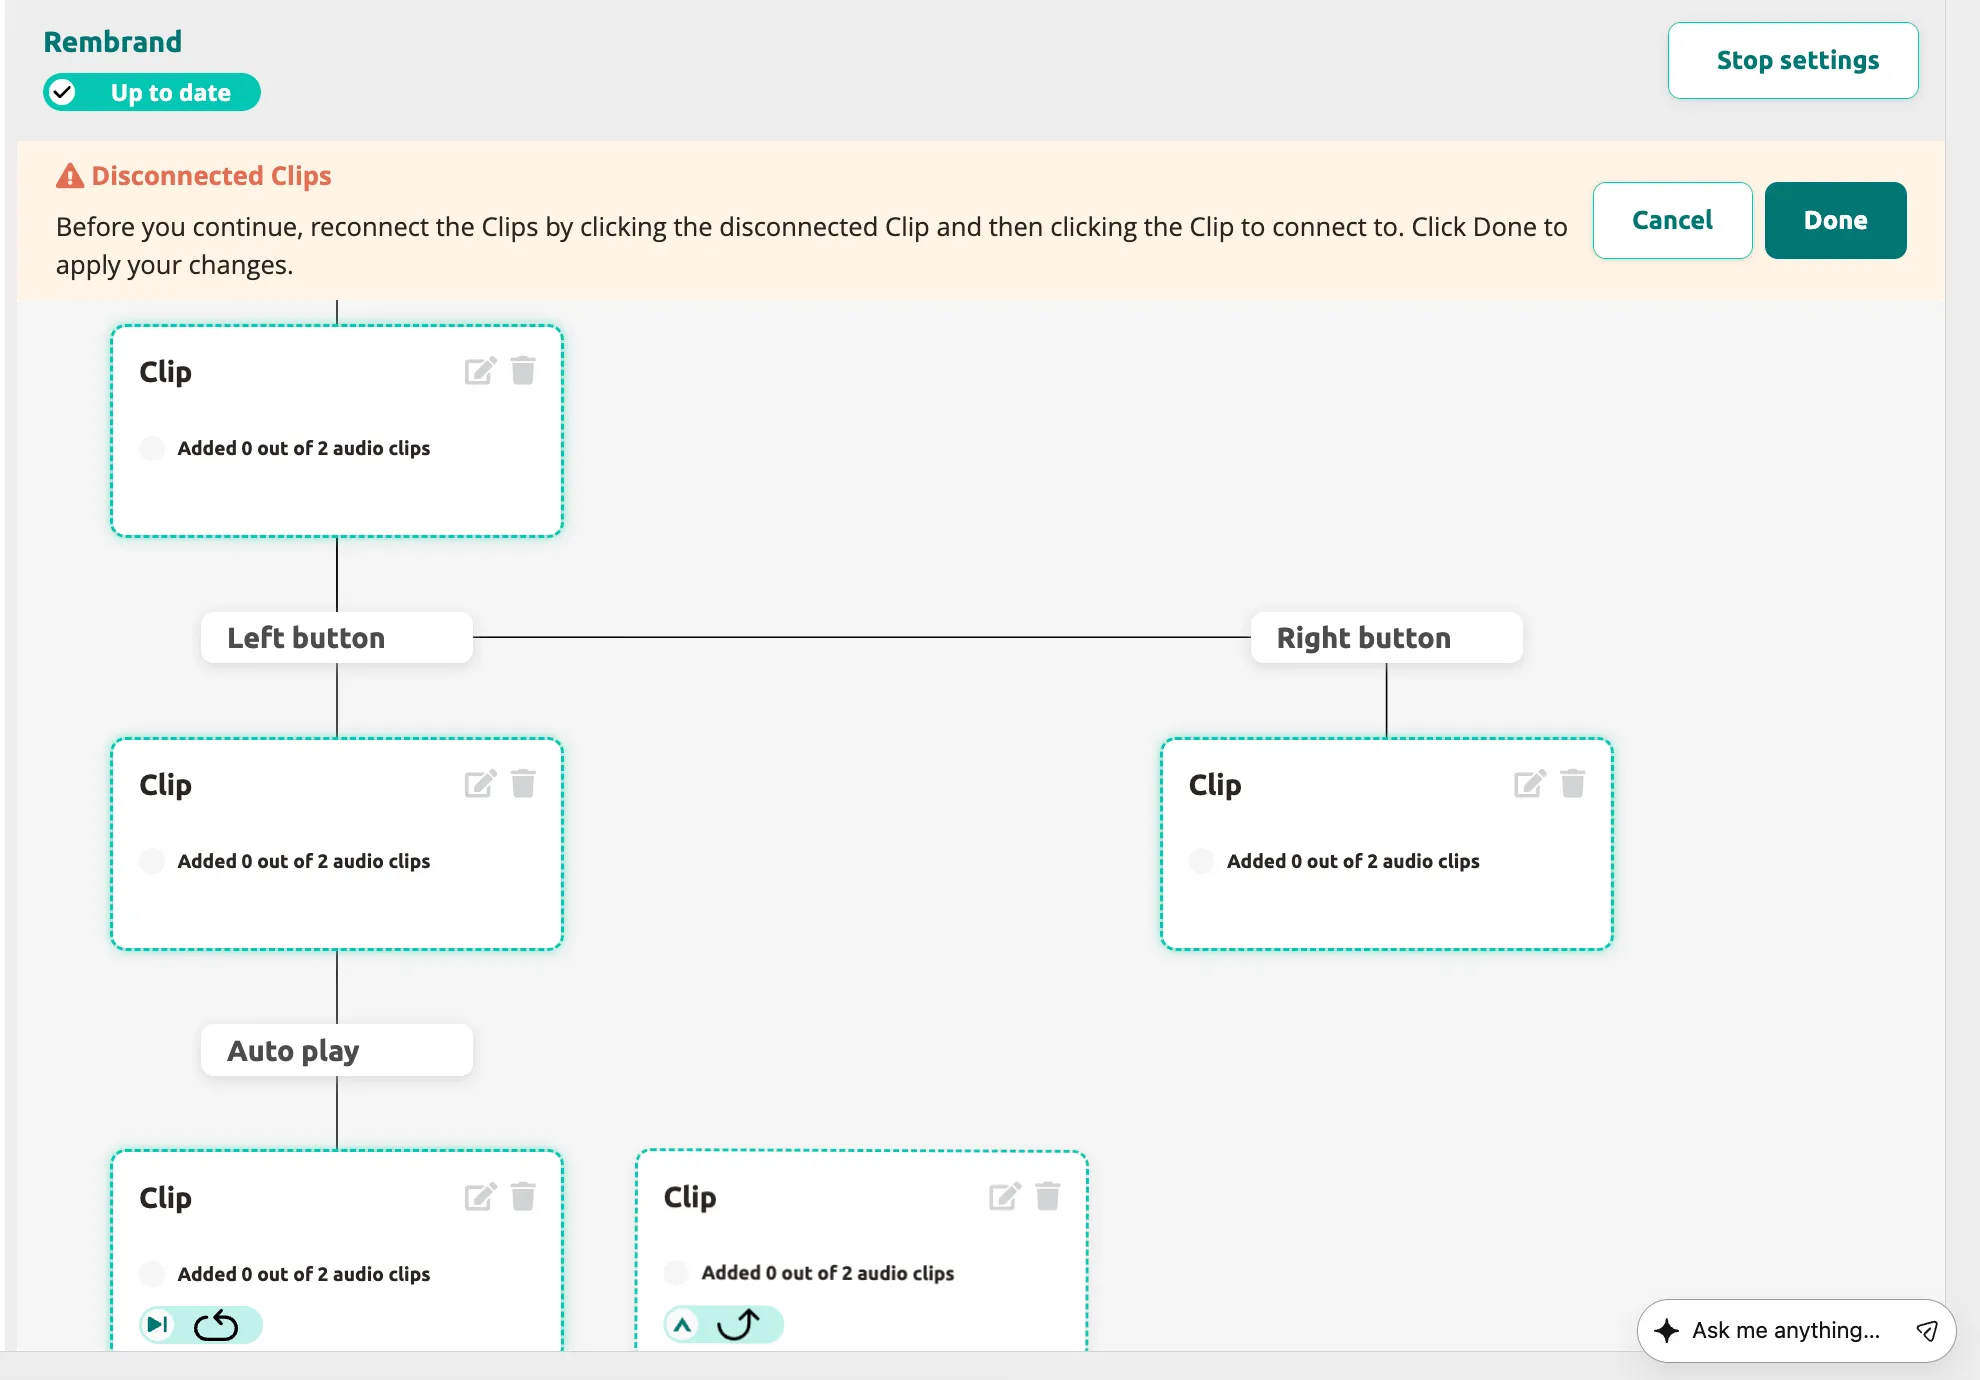
- Choose the connection type (Auto play or button) and click
OK.
- Click
Doneto confirm the reconnection.
AV-sync stops
Section titled “AV-sync stops”AV-sync stops are a special case: they synchronize audio with a video or lighting show and only allow one clip — the Start Clip. You cannot add additional clips to an AV-sync stop.
![]()
Your Clipflow is now set up with clips, connections, and branching paths. Visitors will experience the tour exactly as you have structured it in the tree.
Next: Editing Clips and Clip Settings
Related articles
Section titled “Related articles”- Editing Clips — configure clip content, audio, and settings
- Adding Content to a Tour — manage stops and translations
- Adding Layers to a Tour — add quizzes, surveys, and optional audio
- Create a Tour — start a new tour with the wizard